
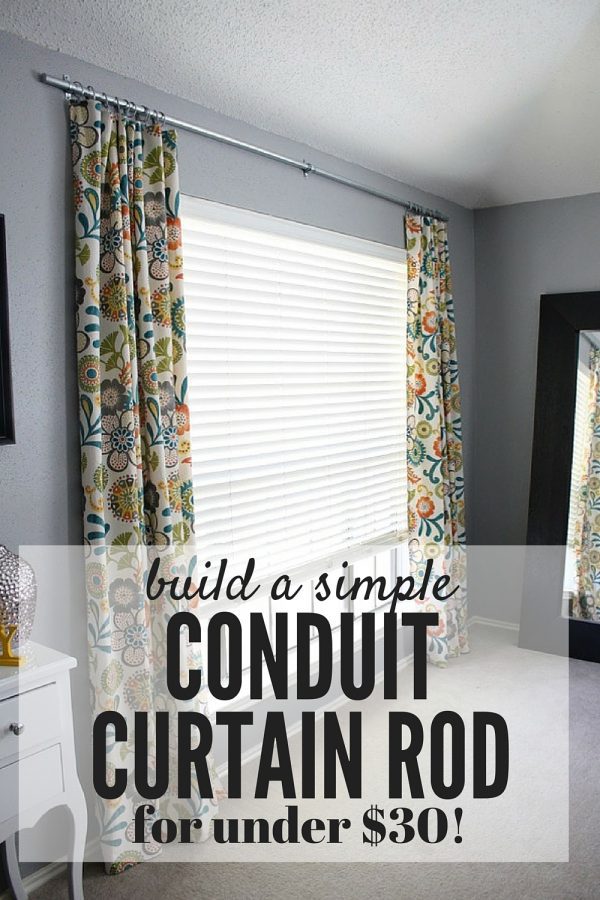
Easy DIY Conduit Curtain Rod
One of my favorite parts of decorating any room is deciding on the curtains. Windows are definitely one of the most important architectural features in a house to me (the bigger the better!) and I love for my windows to look pretty. However, curtain rods can get expensive, so I’m going to show you how I created a super easy DIY conduit curtain rod in our first home.
We had some really large, beautiful windows in the home, but we were on a major budget. I couldn’t find any 12-foot-long curtain rods that we liked in our budget, so we decided to try making our own. We came up with something that we think is pretty perfect – for a whopping $30 for both windows!
Easy DIY Conduit Curtain Rod
Materials needed
- 3/4″ Electrical conduit
- You’ll need the length you want your curtain rods to be
- Two-hole straps
- Amount depends on how long your rods are. We used 3 per rod.
- Set screw coupling
- Only necessary if your rod will be longer than the standard conduit length (10 feet).
- Knock-Out Seals (2 per rod)
- Pipe cutter
- Curtain rings
- We used these.
Step One: Gather Your Supplies
After lots and lots of browsing at the hardware store, we ended up deciding to go with electrical conduit to make our curtain rods. It’s super cheap, comes in a variety of thicknesses, and has a nice, industrial look to it. So, we wouldn’t even have to do anything to the finish (although, you could easily paint them!).
We also got a ton of random hardware from the electrical aisle that looked like it could be used for a curtain rod – things like two-hole straps, couplings, and knock out seals. No idea what those are? Yeah, me neither, but we’ll get to that in a minute.
We decided to purchase 3/4″ conduit for no other reason than that it was the one we liked best. They had 1/2″ and 1″ as well, so you could really go with whatever size you prefer. Just make sure all of the hardware matches your size and you’re good to go.
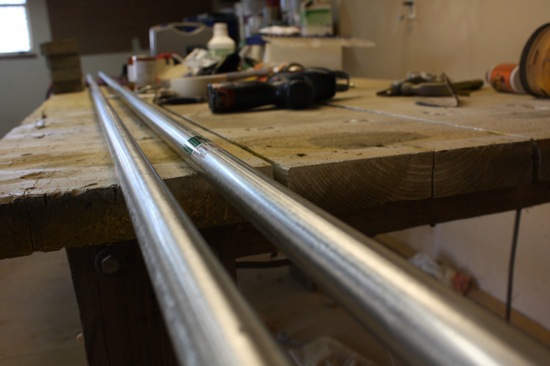
Step Two: Cut Conduit to Size
After measuring the windows, we decided that we wanted 12 feet of curtain rod for the window behind our couch, and 8 feet for the front window.
Of course, conduit only comes in 10 feet lengths. So, that meant we were going to have to do some cutting. We cut each of the 10-foot pieces right at six feet. So, we ended up with two six foot pieces and two four foot pieces.
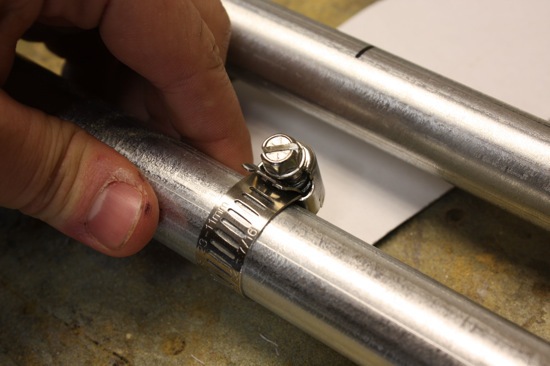
We used a reciprocating saw with a metal-cutting blade to cut the conduit. You could also just use a pipe cutter (which I linked above). But, since we had the saw already we were able to just purchase a super cheap hose clamp from the plumbing aisle to help keep the blade straight.
Below, you can see what the hose clamp looks like on the conduit. We just measured the conduit at six feet, marked it with a Sharpie, and put the clamp on before cutting:
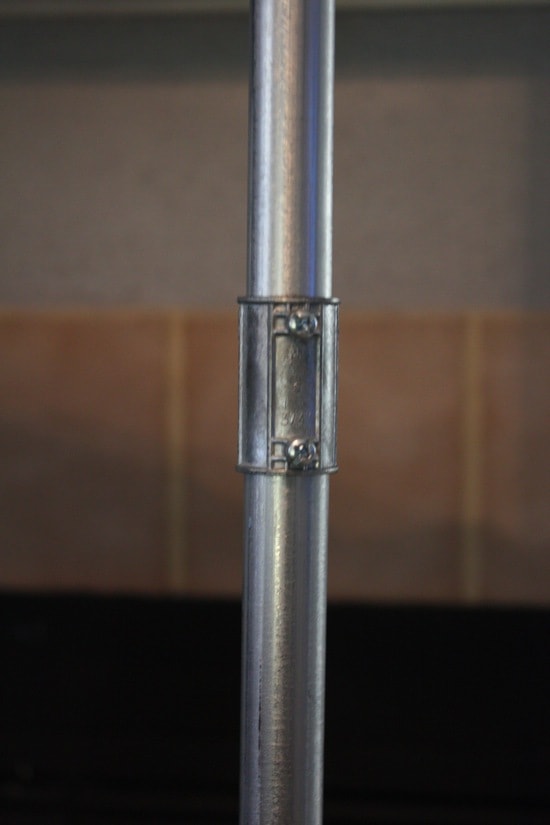
Step Three: Connect Your Conduit
So now we had four pieces of conduit that needed to be pieced together to make a two actual curtain rods. This is where the coupling comes in.
It’s insanely simple to put together. Just put one length of conduit in one end and tighten the screw, then do the same on the other side. And then, you have a DIY conduit curtain rod (almost)!
Step Four: Add Knock Out Seals
At this point, the only thing missing to make this look like a real curtain rod is finished ends. Because conduit is used to run electrical wires, it is hollow in the middle and has holes at the ends. We wanted it to look a little more finished. We talked about actually getting finials for the ends, but we couldn’t find any that we liked. So, we found some caps for the end (they’re technically called knock out seals) and plopped them in.
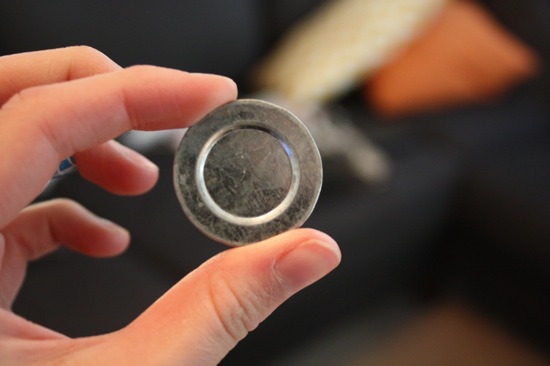
The only weird thing to keep in mind about the knock out seals is that you have to get a size smaller than your conduit in order for them to fit. We had to buy 1/2″ knock out seals to fit into our 3/4″ conduit.
We’re really glad we went with these rather than an actual finial. You can barely even see them once the curtain rod is hung. It just looks nice and finished! And it was extremely simple, which is exactly what we were going for.
Step Five: Hang Your New DIY Curtain Rods!
At this point, we were finally ready to hang them. We wanted to hang ’em high and wide to maximize the visual size of the windows. It sounds like a silly concept, but this little graphic is my favorite way to show how big of a difference it can make:
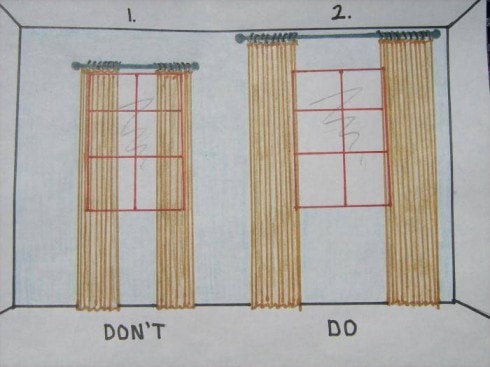
(Via)
One thing to keep in mind if you tackle something like this is to make sure you put your curtain rings on the rod before hanging it. The rod sits very close to the wall and can’t be taken out nearly as easily as traditional rods. So, you’ll want to have the rings already on it and ready to go as soon as you’re done hanging it!
To get our curtain rod on the wall, we used two-hole straps.
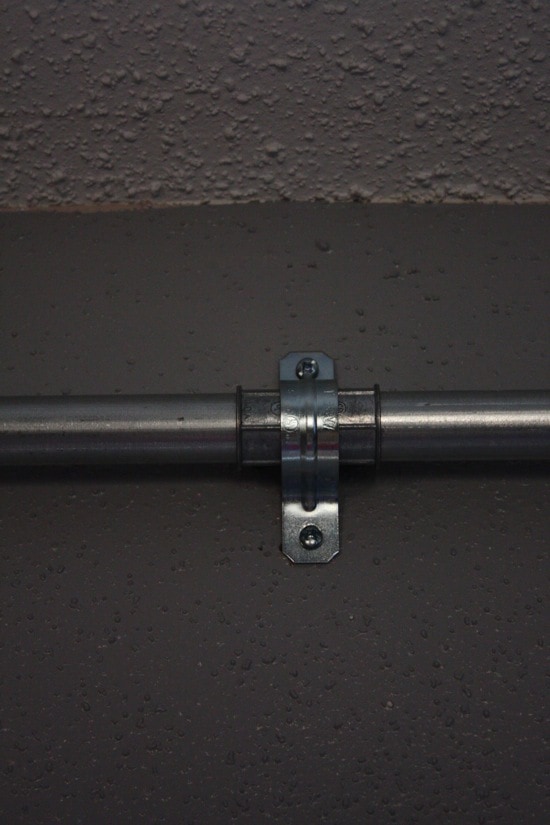
An important thing to remember here is that you’ll need two straps in the same size as your conduit, and one that is a size larger. For example, we used two 3/4″ and one 1″ strap on each curtain rod. The reason for this is that you’ll put a strap on either end and one in the middle – and you have the coupling in the middle of the rod. This adds some bulk to the middle section. Thus, you’ll need a bigger sized strap.
From here on out, it’s easy – measuring, screwing in the straps, and hanging the curtain rod!
We ended up using curtain rings with clips to hang the actual curtains. I wasn’t about to actually sew grommets into the curtains, and this was the easiest (and cheapest) alternative.

We’re really happy with how the rods turned out. They have a little bit of an industrial feel, but mostly they’re just incredibly simple and fade into the background. It allows the curtains to be the star of the show!
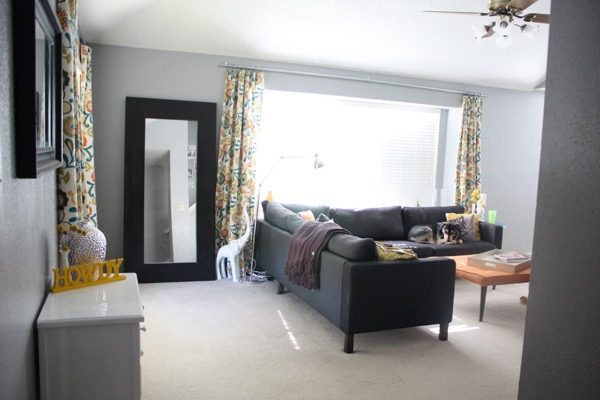
Yup, I think I like ’em. This project was quick, simple, cheap, and it turned out beautifully. My favorite kind of DIY project! I’m kind of inspired to make DIY conduit curtain rods for every room in the house now…too much?
So thrilled to find this post! I made a 13’6″ rod today out of 2 pieces of conduit. I saved over $70!
Thanks for the clear instructions. I just installed a double rod above a 13 foot window. The biggest expense was I used ready-made brackets (Home depot Martha Stewart $8.95 a pair and I needed 3). Haven’t put the finials on yet but I think we are going to find wooden dowels that fit in the ends and screw the finials into those.
Hi! I loved this post and it was sooo helpful! I just got home from Home Depot with all of my supplies! I actually made the same cuts as you because i also need a 12 and 8 foot rod. Quick question though…the knock out seals I bought are not fitting in the ends. Did the ones you bought have little edges on the back side of them that would keep them in place? I bought the 1/2 inch ones for my 3/4 inch conduit but they will not pop in. Just wondered if you had any toughts.
Yes – it definitely takes some work to get them in! We used pliers to bend back the little tabs on the back far enough that we could hammer it in. It’s just for looks, not really function, so it’s not a big deal if you have to bend the tabs a lot. Hope that helps!
Hi! Thanks for posting!! I’m looking to do the same project & stumbled upon this blog by way of google searching how to hang conduit as curtain rods. Since you’ve finished your project I’d love if you could answer a couple questions for me: 1) are the curtains functional on the rod? Meaning, can you move them freely? The closeness to the wall makes me nervous as I hope for mine to move smoothly. & 2) did you guys use hollow wall fasteners or studs to secure the conduit to the wall? I bought 1/2 inch conduit so it wouldn’t be as heavy but I do like the look of the 3/4 inch so just curious if you’d secured them beyond the screws into your drywall. Thanks for the help! Your work looks great!
Ours are not functional – we have blinds in addition to the curtains so we have no need to draw the curtains. However, I’ve seen several different solutions for this – some people have used L-brackets to hang them from the ceiling, and I’m pretty sure you can also find brackets for curtain rods separately if you look at Lowe’s. So, you could buy the hardware for the rod to hang it but use the conduit for the actual rod – does that make sense?
We used hollow wall fasteners for ours, because they weren’t going to be going into studs and we didn’t want to risk a giant mess if the curtains ended up being too heavy for just the drywall! 🙂 Hope that helps – and good luck!
Wow! That is awesome. We have a 118″ wide window in our living room that took me MONTHS to get curtains for because of the rod dilemma. I finally bit the bullet and bought a $50 one from Lowes, but I want a sheer curtain for privacy that will still let in light, and I think I’ll use this idea. Thanks!
Repurposing commonly and cheaply available hardware is definitely the way to go.
I’m outraged by the rip off prices charged for low tech no tech commercial products such as these.
There is simply no reason a lousy curtain rod should cost 50 to 100 dollars.
More people need to DIY and thumb their noses at the rip off artists who overcharge for products like these that involve zero technology and no moving parts.
Good job. I made curtain rods using $7 closet poles, with the hardware that goes with it, spray paint and rings – but the longest I’ve seen is 8′. I’ll have to look into this for my 10′ living room windows. And I love the curtains, those colors would match my room if only I was bold enough to go orange.
I love them! They are perfect and the fabric is intensely awesome! I’m so a bold print girl- love it!
Ahh! Your living room is so colorful and fun! I love it!
Love the look! I just pinned conduit curtain rods last week, and it’s so fun to see them in “real” action!
Wow! those are beautiful. What fabric is that and where did you get it?
Thanks! It’s from Tonic Living and it’s called “Tempo, Mambo” 🙂
Ok, you make this sound way too easy! Love that fabric you chose too, I have such a difficult time finding curtains I like, I’ll have to give in and make them myself. :/
I promise, it IS that easy! 🙂
They look SO good! I love the curtains and I love the DIY rod. I think you’re right that it is way better than anything you could find in the stores.
Wow, you and Corey are so inspiring and handy. They looks great!
They look awesome! Great job on getting it done for cheaper than the other options out there.
Oh my gosh! I love how they turned out! I agree that it makes your space looked soo much more finished. Great job!
The curtains add so much to the room! I love how your living room is coming together!
Oh, how I wish we’d thought of this when we were shopping for rods for the first house we rented together! Thankfully, when we moved, we were able to reuse the massive curtain rod (that, yes, was at least $50, plus rings) to span both our reach-in closets after removing the hideous sliding doors.
Will definitely keep this in mind for the next place, though, it’s a fabulous fix!
Wow, y’all. You continue to amaze me. Everything about this…the print on the curtains, the rods….all of it…amazing.
They look amazing!! I can’t believe you guys just kind of winged it and it came out looking so good! I definitely agree about the turquoise side table, but I’ll be sad to see it change since I really do love the color. The fabric fits the room so perfectly!
Perfect! Love the pattern and color. The light you get in those windows is pretty amazing, too. I love fabric. I think it is a great way to break up the texture of the wall and the color. A little can go so far. Great project.