
Our New Front Flower Beds
Today I’m sharing a few simple front yard flower bed ideas, along with a look at how we totally transformed our front yard flower bed over the weekend!
Allow me to be really honest with you today. Although I’m generally pretty confident when it comes to interior design, I am a hot mess when it comes to the exterior of my house.
Corey and I often laugh about the fact that our front and back yards tend to look like complete disaster zones. Our neighbors would probably be shocked if they saw how well put-together the inside of our house actually is! We’ve never had the greenest of thumbs. And, since we’re always in the middle of a project (or seven), there’s generally a lot of random renovation debris floating around outside of our house. It probably also doesn’t help that we have no idea where to start when it comes to landscaping.
But, we recently realized that having no idea what we’re doing has never stopped us before. I mean, that’s basically our motto when it comes to home renovations.
So in this house, we’re making an effort to be more intentional about making the exterior beautiful, not just the interior. We already utilize the outdoor space much more than we did in the old house, thanks to the covered patio and shaded backyard. So, we might as well do our best to make it a space we can be proud of.
The Before
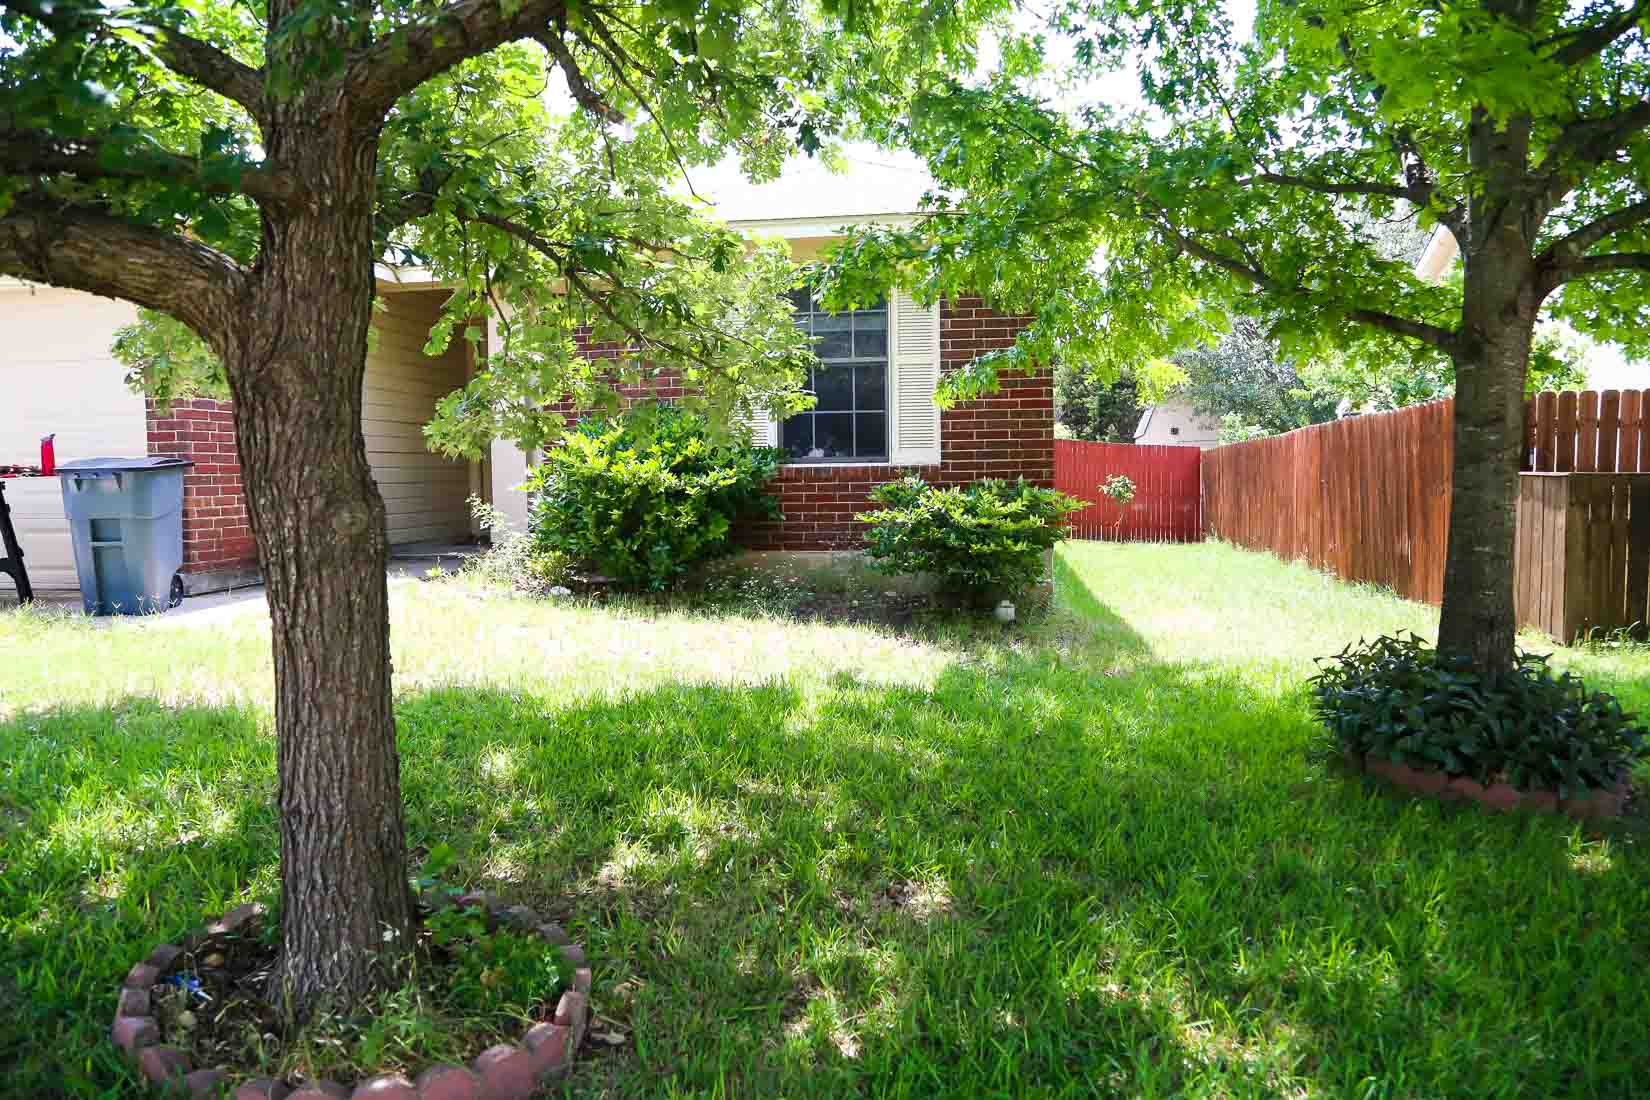
Let’s start with where it all began. One of the things that has driven both of us absolutely crazy since we moved into this home six months ago was the front yard landscaping. It was generally a disaster.
Cute, right?
I mean, I don’t need a totally stunning front yard or anything. But, walking up to this every single day when I entered my home got really old really fast. It was time we did something about it. So I did.
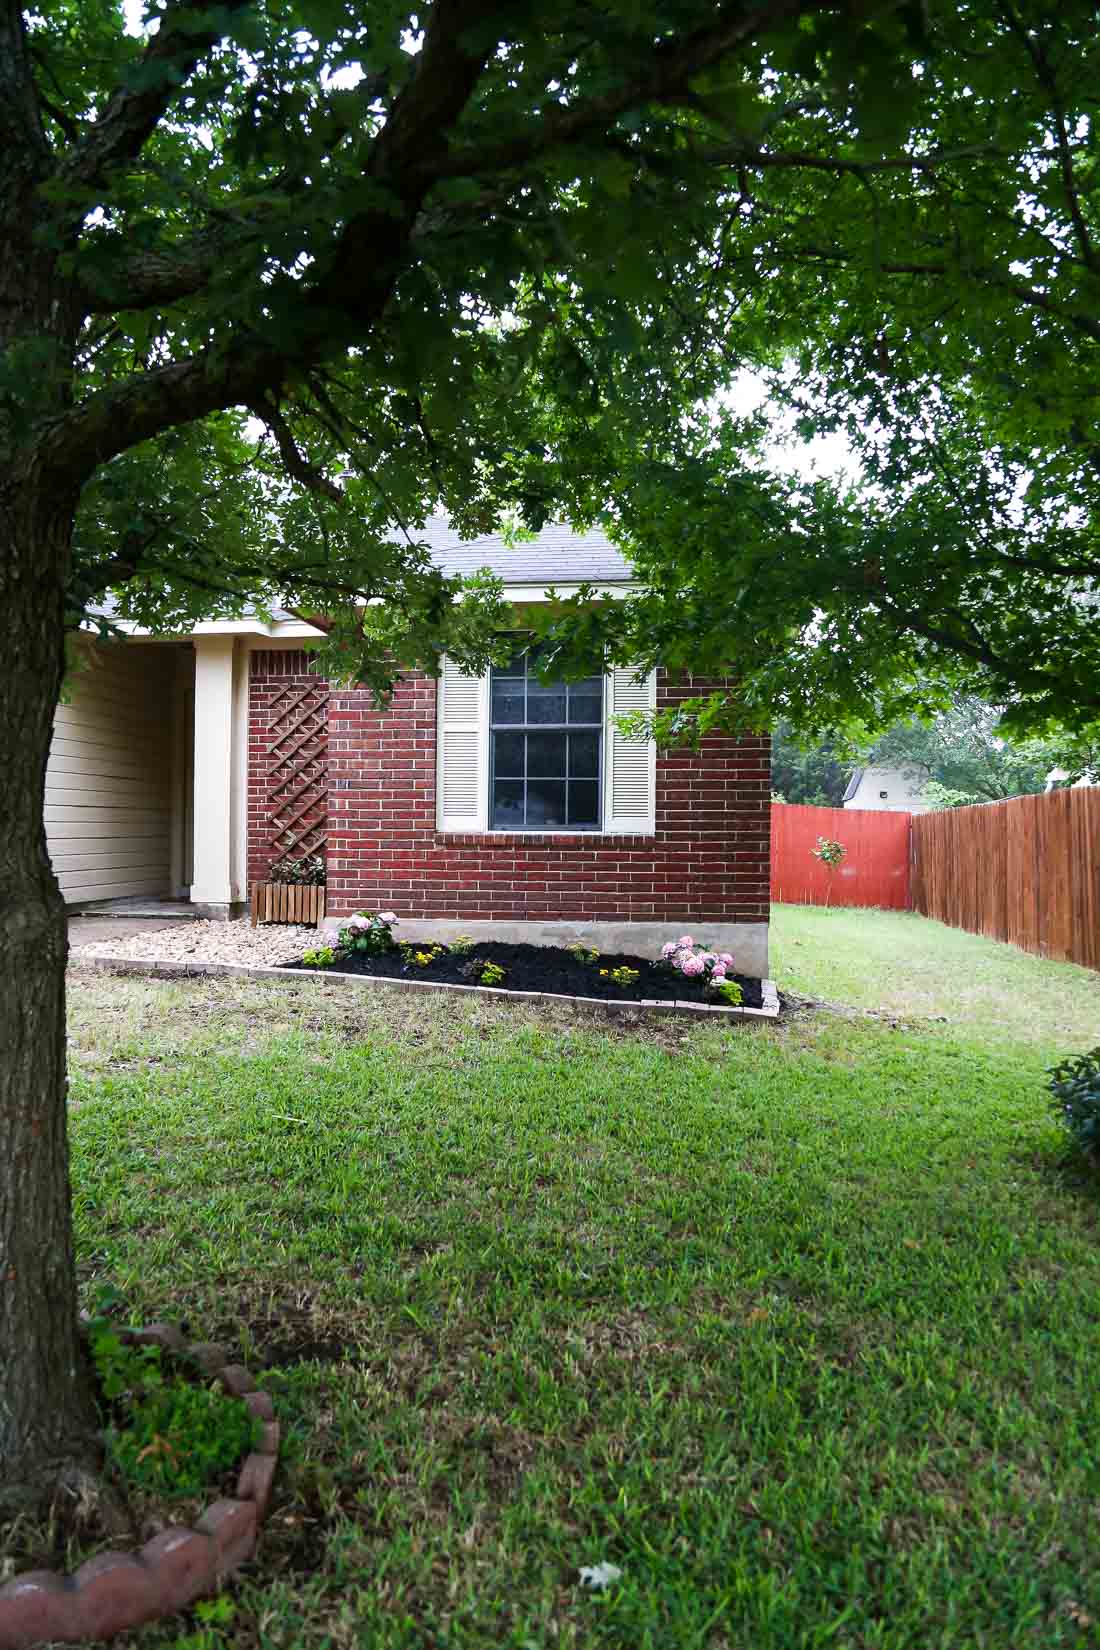
And the after?
Well, I think it looks a lot better.
Simple Front Yard Landscaping: The Plan
Let’s break it down a bit. Here’s what we knew about what we did and did not want out of our front yard landscaping:
- Neither one of us is a big fan of bushes. We just don’t maintain them well enough to keep them looking nice. Over the years, our bushes have a history of just getting out of control and impossible to maintain. Plus, we prefer something a little more flowery and colorful in our landscaping – especially in the front yard.
- We wanted something simple and easy to maintain. I don’t know whether or not I’ve made this clear yet, but we don’t necessarily do a great job of maintaining our exterior landscaping. It’s less that we’re lazy and more that we’re clueless and often bite off more than we can chew. This time, we wanted to choose simple plants that would look nice and be easy to keep alive. Plus, we wanted to avoid anything that required tons of pruning!
- I wanted to remove any living landscaping from the area next to the door. It’s hard to avoid that area being stepped in and trampled a bit, so I was doubtful that we’d really be able to grow anything that looked nice. Plus, I felt that plants or additional landscaping made the small entry feel even more cramped. I wanted a more open look that required zero maintenance.
- Finally, we wanted color! All of our front yard landscaping in the past has been full of nothing but green – bushes, mostly. This time around, we wanted to add some color to the front of our house. More bushes just made the entire front yard feel too full and visually overstuffed. We wanted to bring in some color and flowers to brighten things up a bit!
Simple Front Yard Landscaping Ideas
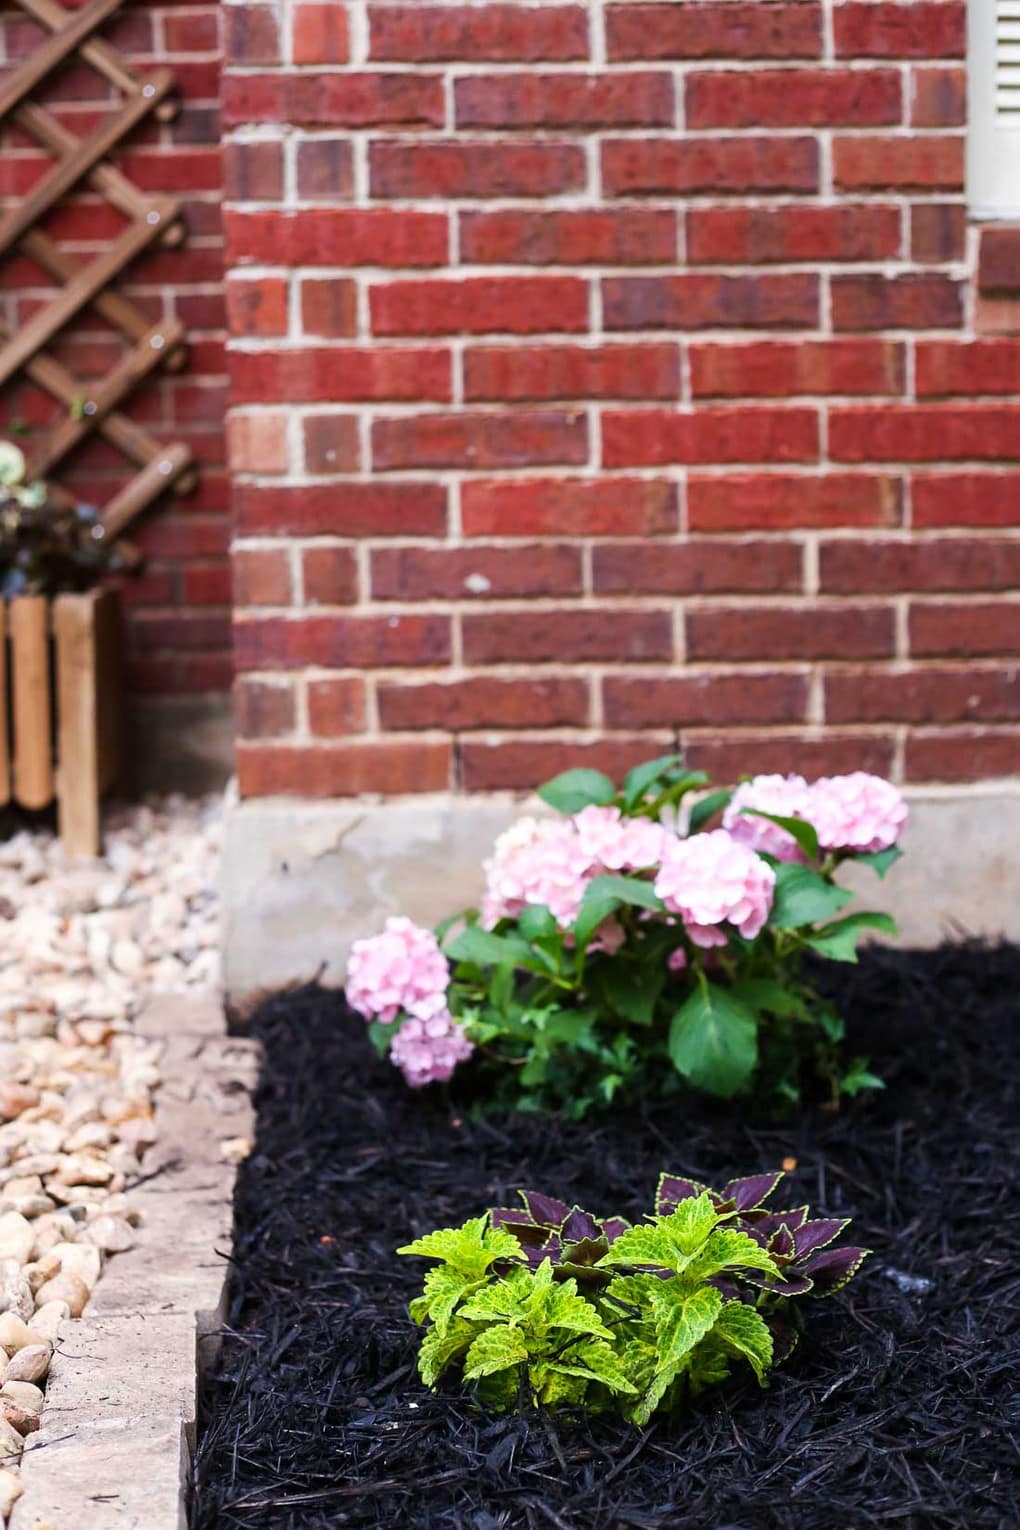
Once we knew what our overall wants and needs were, it was time to dive in. Let’s chat about the flower bed first. We wanted to do something larger on either side of the window but, like I mentioned before, we wanted to avoid a bush. After browsing around at Lowe’s for a while and debating the different options, we landed on hydrangeas – “big leaf” hydrangeas, to be specific.
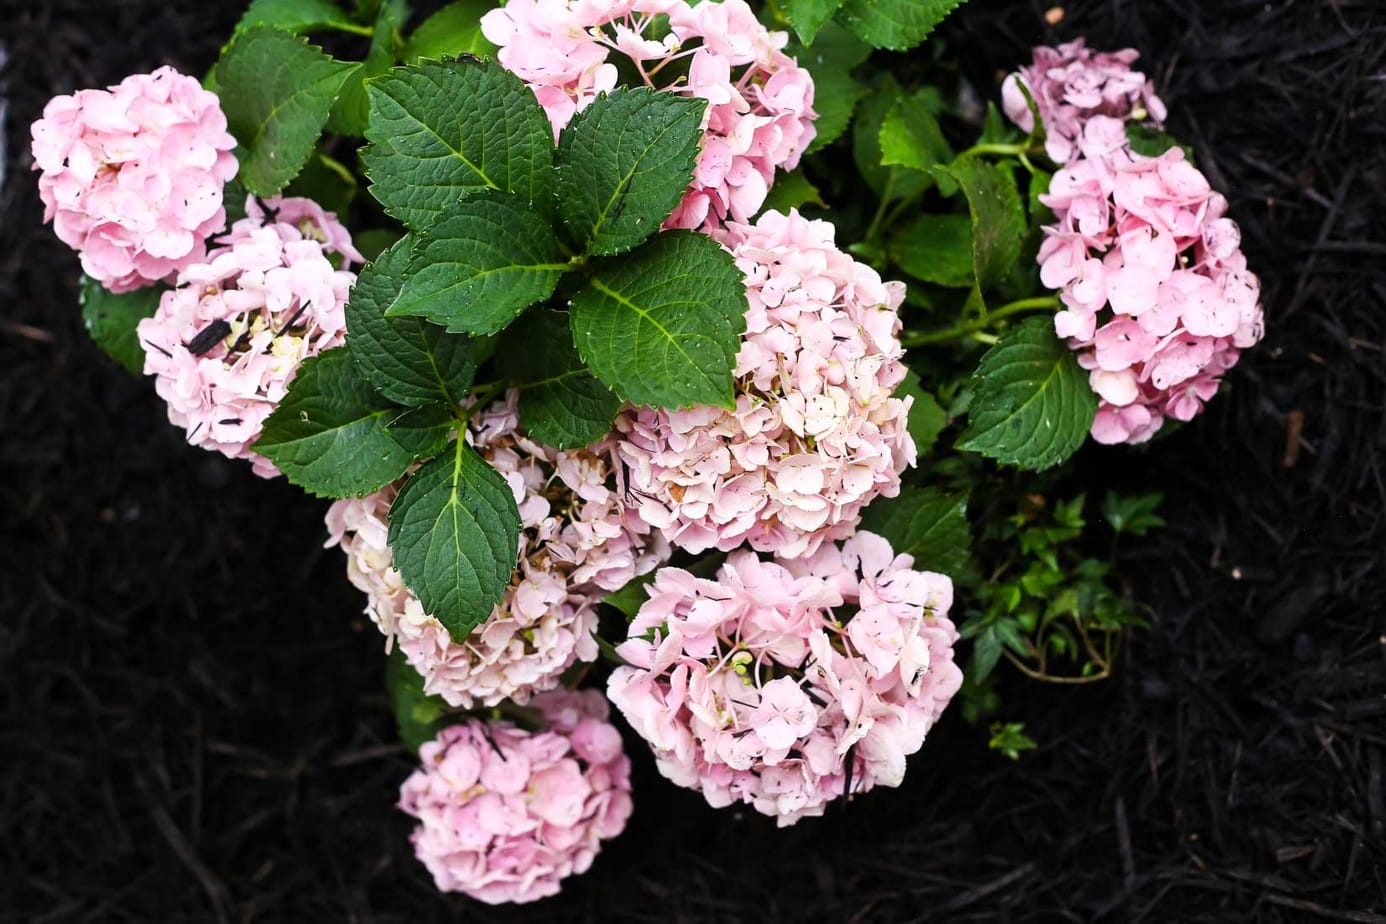
Our research told us they were great for our gardening zone, do well in partial sun, and require very little pruning. They grow up to 6 feet tall, so over time they should fill in really nicely and be really impactful.
Once we chose the hydrangeas, we needed to add in other plants to fill in the rest of the bed. I wanted something leafy (but not all green!). I quickly fell in love with these cute little Coleus plants. My research told me they are incredibly easy to care for (that’s what I like to hear!) and I loved the multicolored leaves.
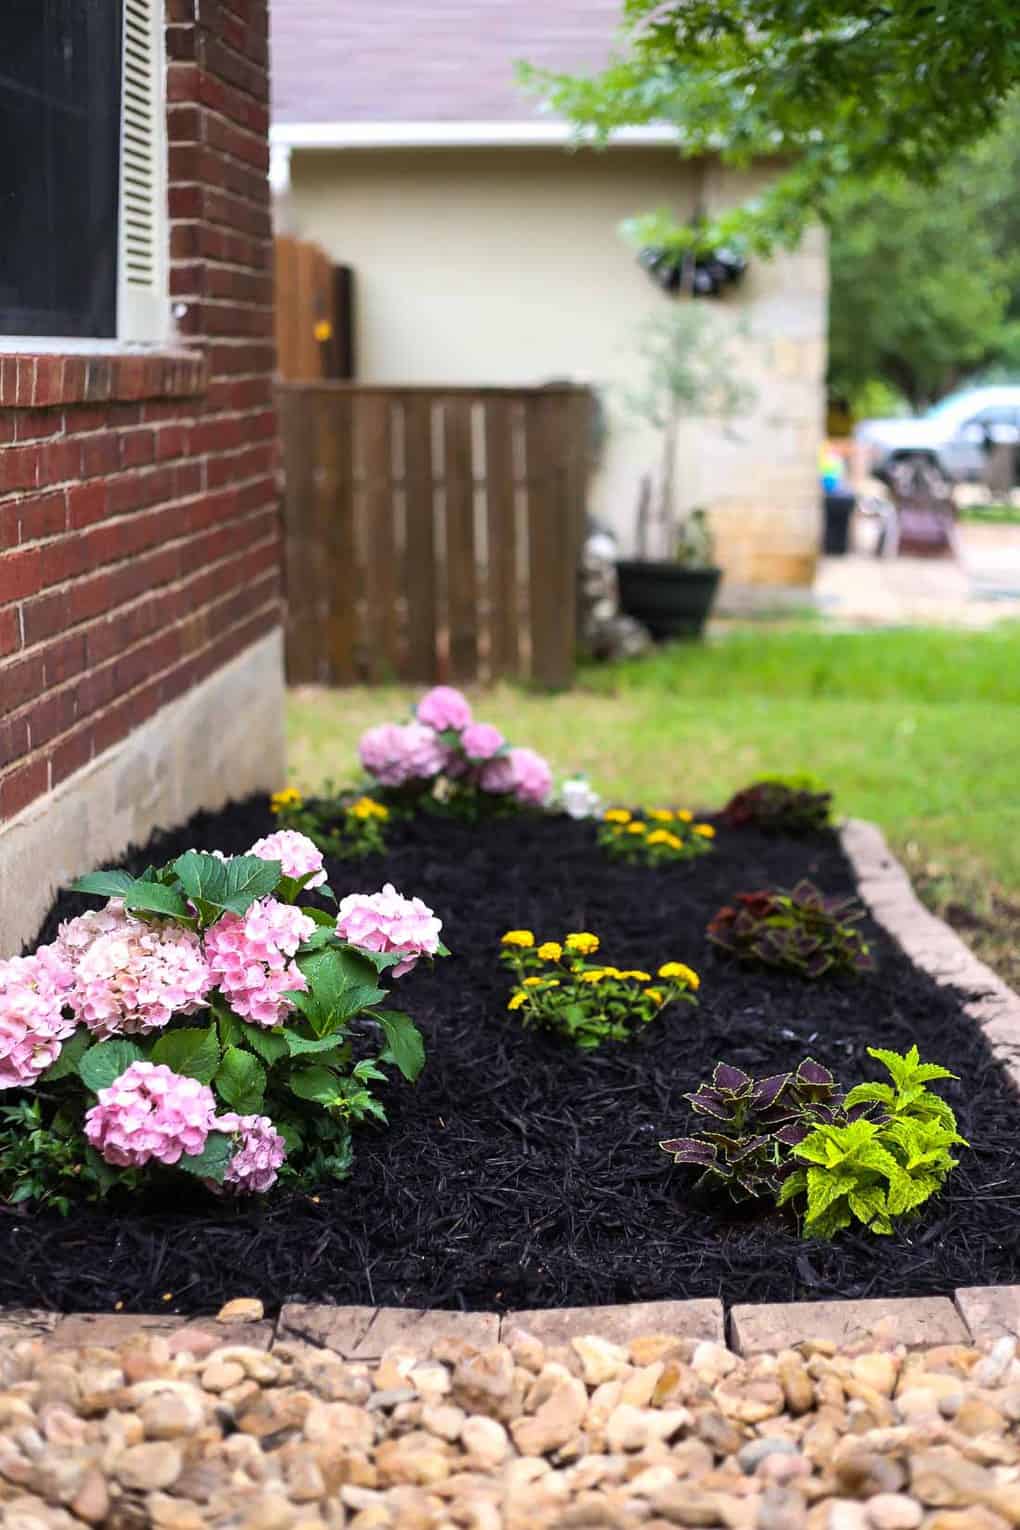
And finally, we filled in the rest of the bed with some simple lantana. Once all three of these plants fill in a bit, I’m thinking we’ll have a really full, colorful, and fun-looking flower bed.
Once everything was planted and ready to go, we added a super simple border to keep things contained. There wasn’t any border at all before, so just laying down some pavers made a world of difference! Then, we mulched the entire bed to keep the soil moist and looking pretty.
Adding Some Rockscaping + A Trellis
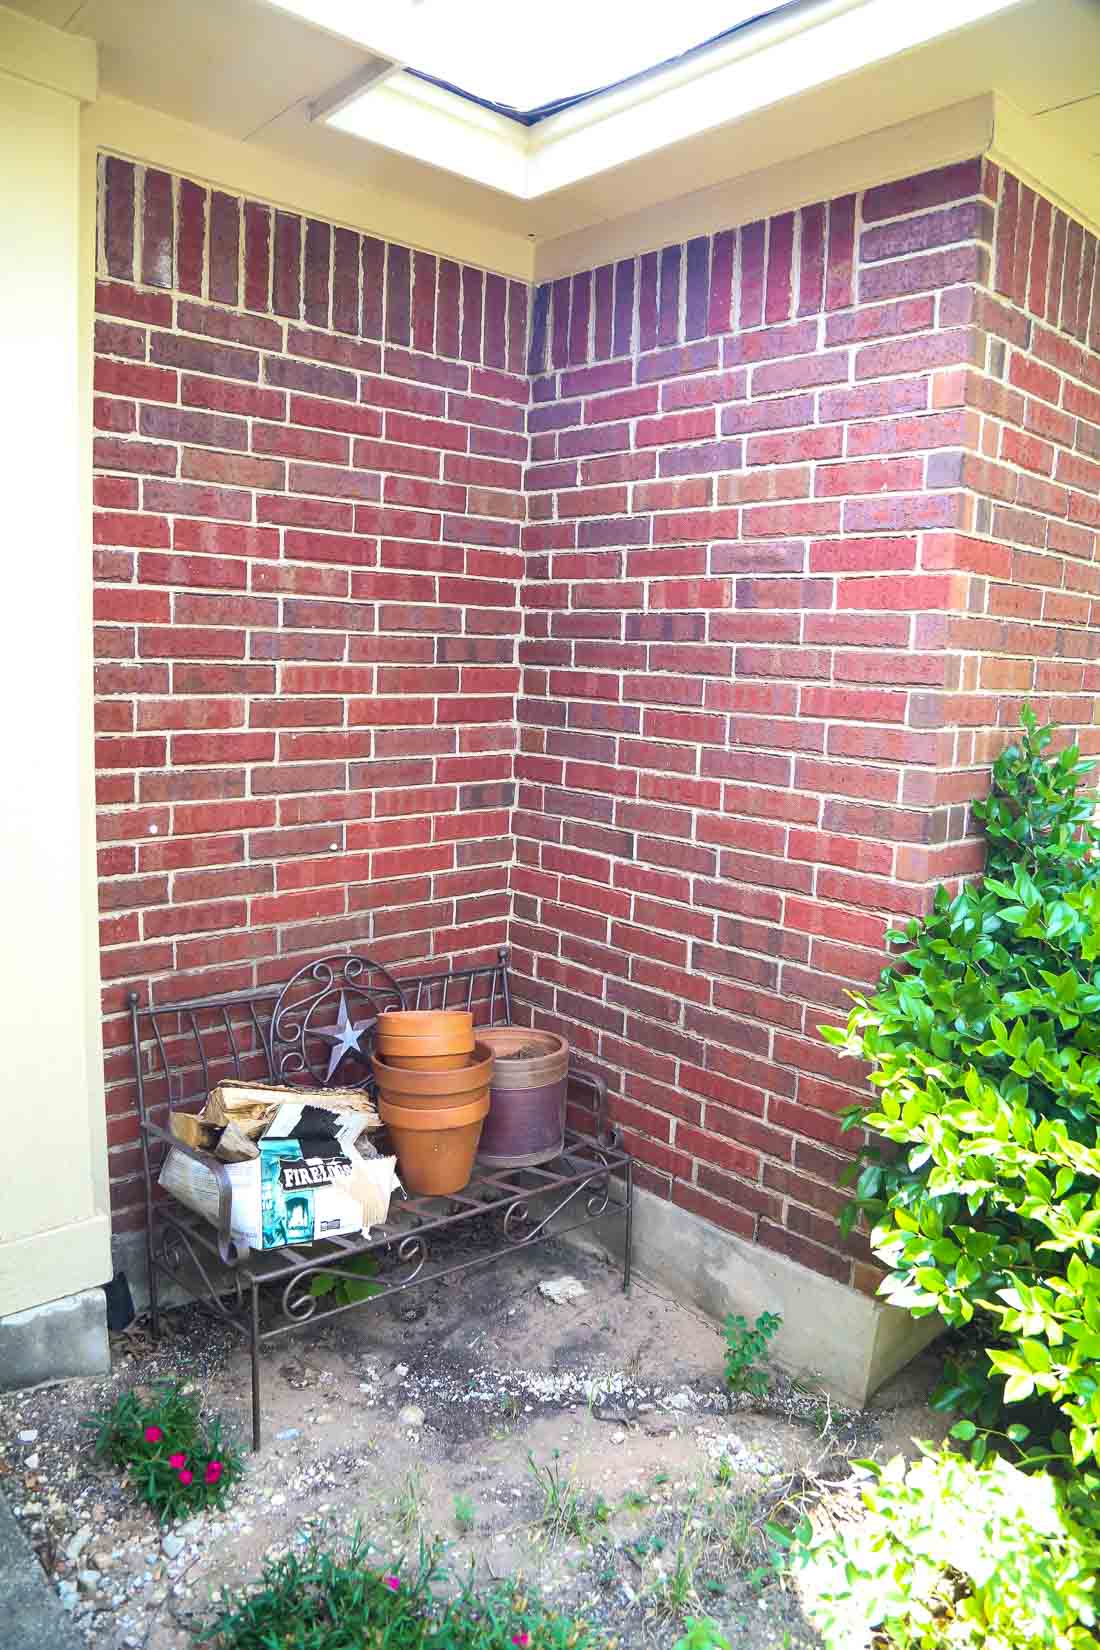
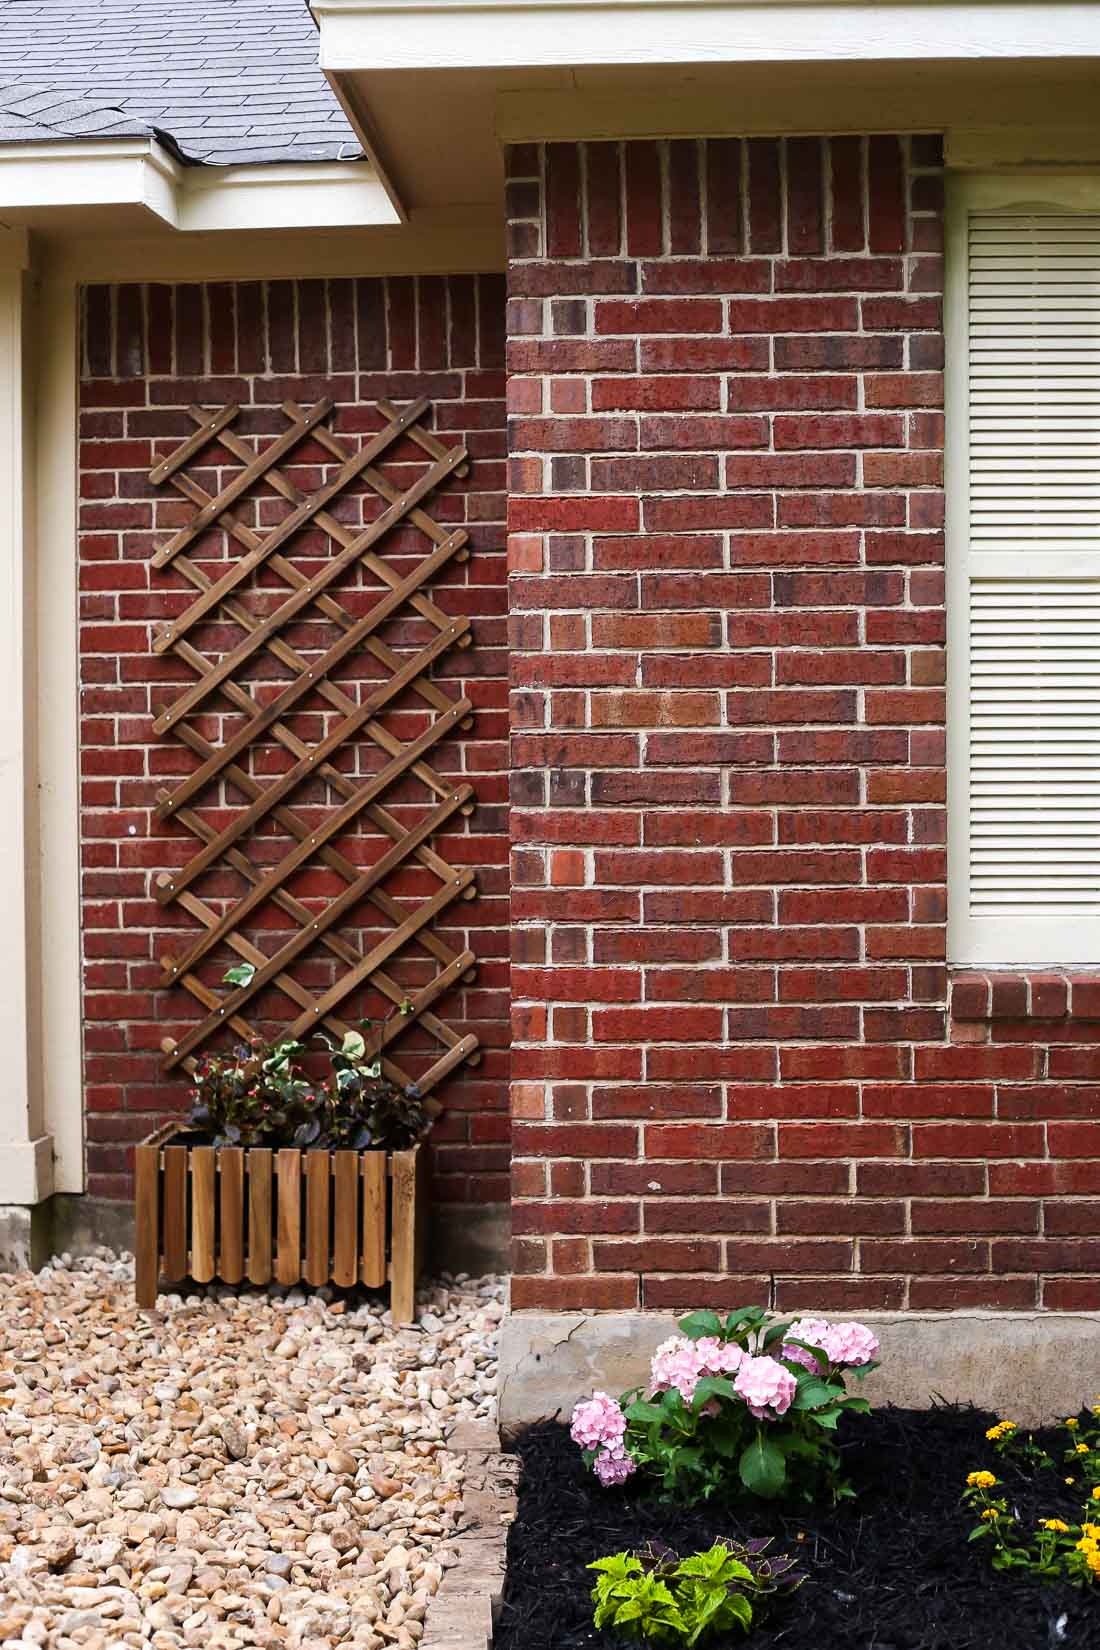
The final part of our project was the annoying little area next to the front door. I mentioned earlier that it drove me pretty nutty. I knew we wouldn’t really be able to keep anything alive there and I wanted to just simplify it as much as possible.
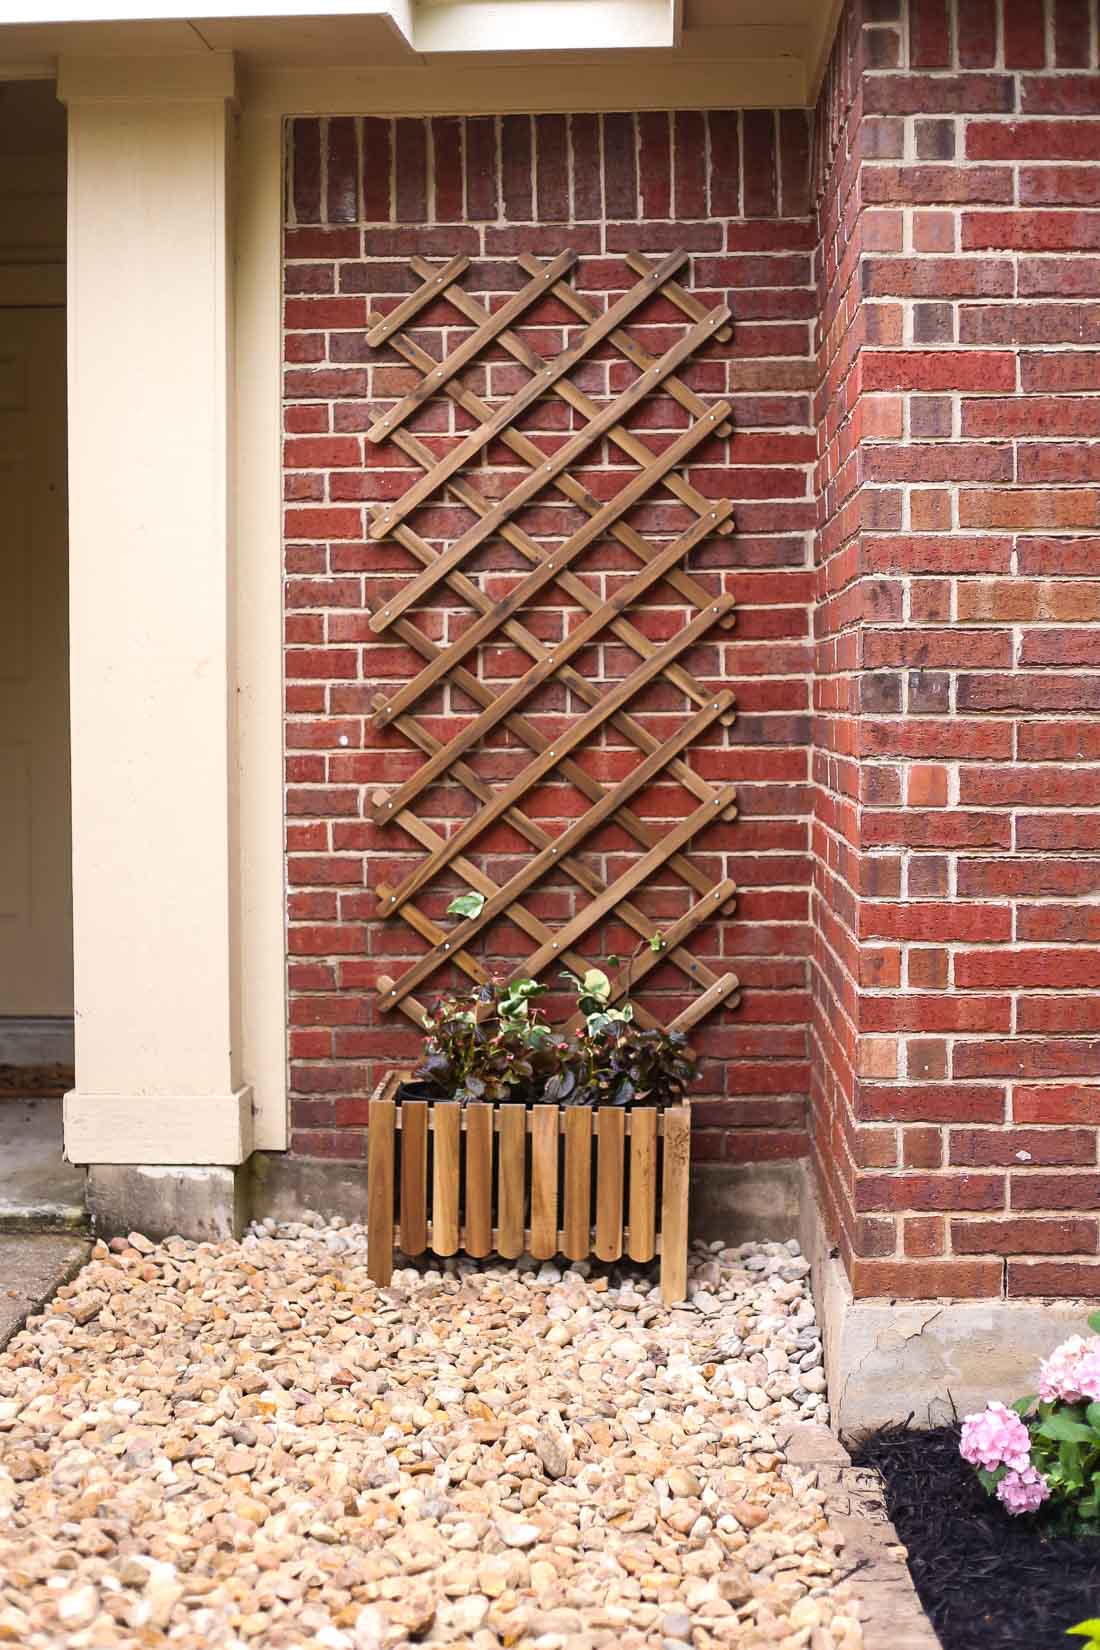
Corey and I both agreed pretty much immediately that this little area was begging for a trellis with some pretty ivy growing up it. So, I snagged this planter and trellis set for just $50 from IKEA. After some research, I came up with a few options for what to plant in it:
- Confederate Jasmine
- Morning Glories
- Star Jasmine
- Algerian Ivy
- Trumpet Vines
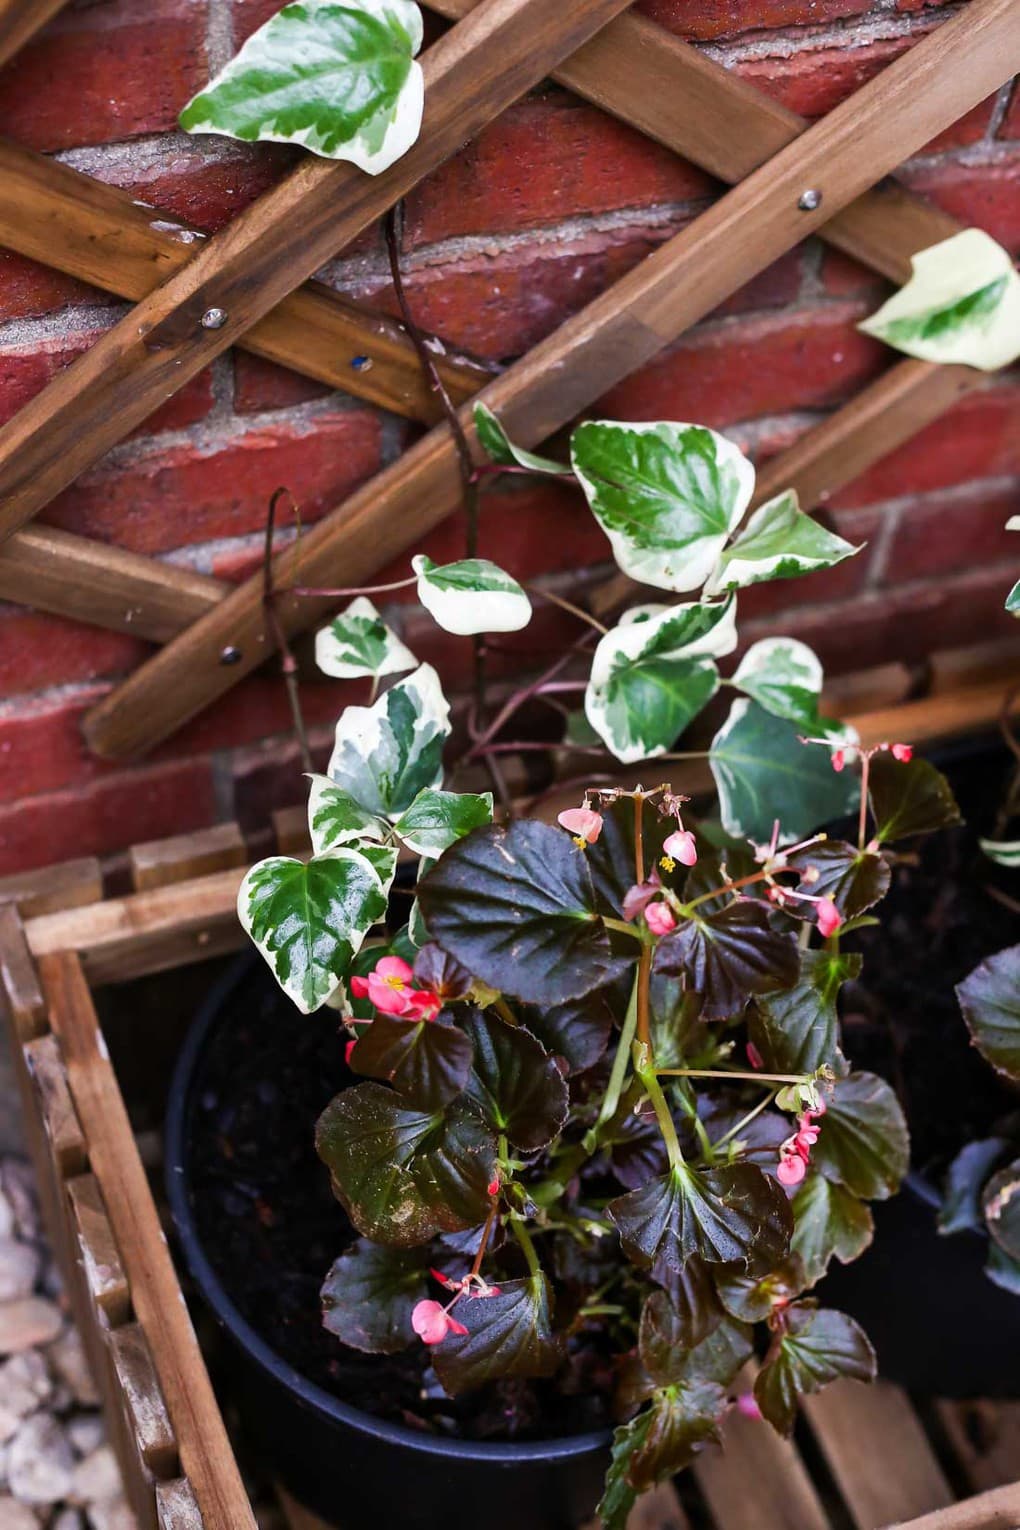
We ended up landing on Algerian Ivy. It’s perfect for our gardening zone and doesn’t like too much sun. It should do pretty well in this little area! You can’t plant directly into the IKEA planter (it’s slatted on the sides and bottom). So, I just grabbed two large plastic planters that fit perfectly inside. I planted the ivy in the back and some begonias to the front of the planters. For now, I like that they fill in the gaps a little and make things look a little less empty.
And, of course, the final step to our front yard landscaping adventures was to add some Colorado river rock to this section of the bed. I hated the bare mud look that was there before. I’ve known for a while that I wanted to do some simple rock-scaping here to make things look a little bit cleaner. We hit up our local rock & landscaping supply store and got a cubic yard of this rock for just $59. I don’t know if you know what a cubic yard of rock looks like but, um, it’s a lot.
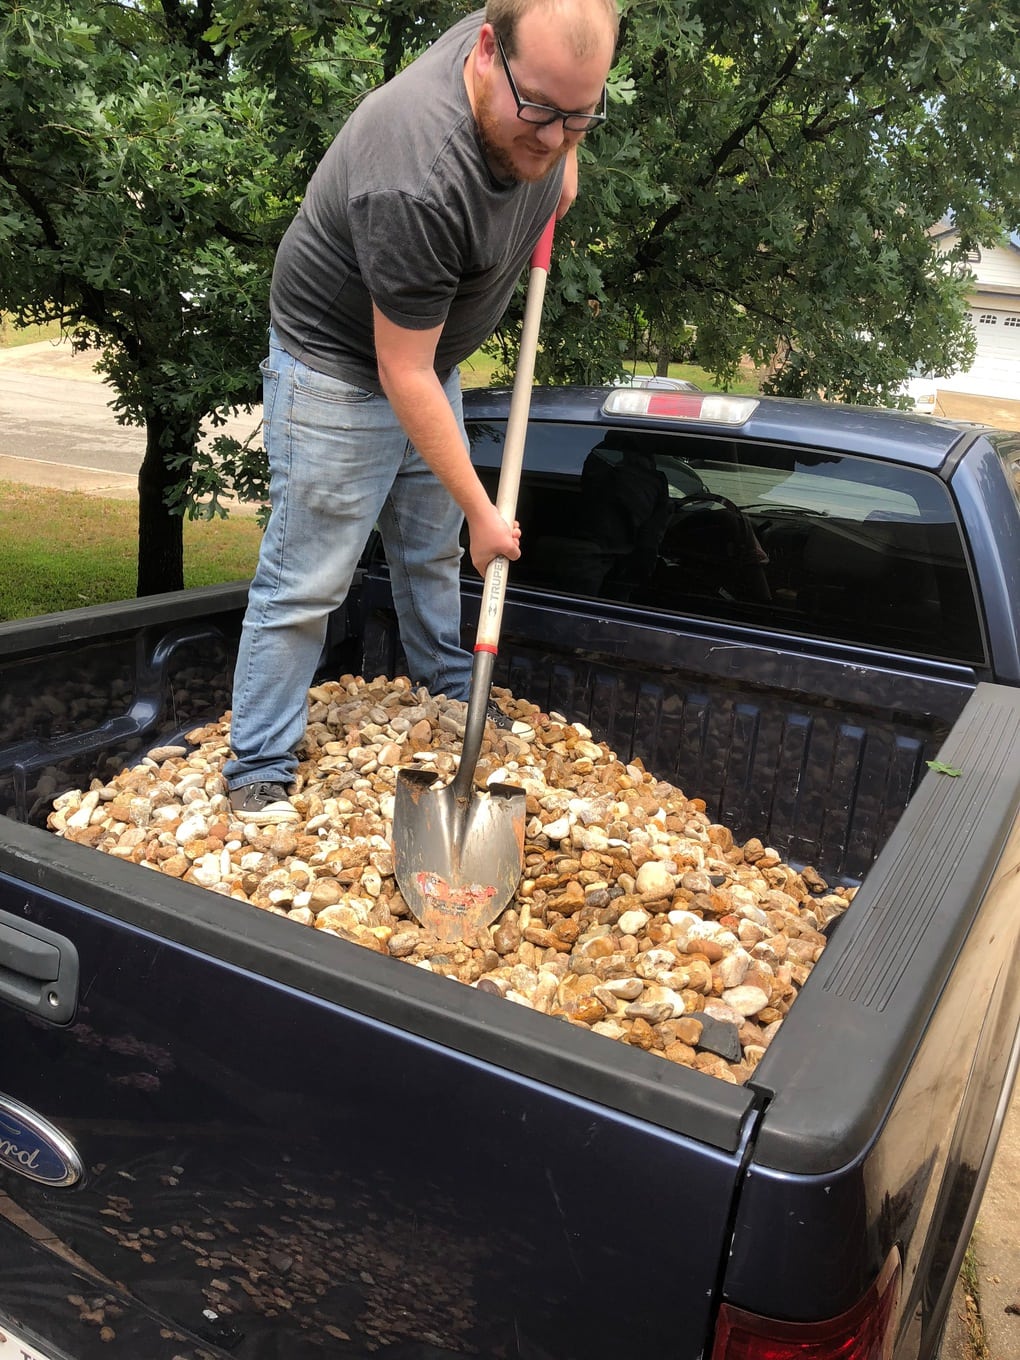
All we did for this was level out the soil, lay a weed barrier, and then shovel the rocks in until we were happy with how it looked. It was a lot of physical labor and poor Corey had to do most of it alone because my 6-month-pregnant self can only handle so much. But, it was worth it!
Overall, I’m super pleased with how this project turned out. I don’t cringe when I walk up to my house anymore, which is a total win. Our front yard landscaping makeover isn’t quite done yet, though. We still have to trim a few trees, replace some of the flowers under the trees (they all have different things planted under them, and I’d like a more cohesive look), and I’m dying to give our front door a makeover.
You know how it is around here – the to-do list never ends!
Wow, the once bland and old look comes into life with your transformation landscaping ideas put here. Really loved seeing the before and after look. Would love to see the look this year, sure do there are new ones you’ve placed by now.
Great job with your garden! The flowers will look great when they fill out. In a few years, those hydrangeas will get really tall. My mom had them in her yard, and they really spread out too. I plan on planting my garden soon, but I want to add features that will look pretty while I wait for my plants to fill out, like some sculptures or birdbaths.
That’s what we’re hoping for the hydrangeas! I’ve seen some big bushes that are just gorgeous!