
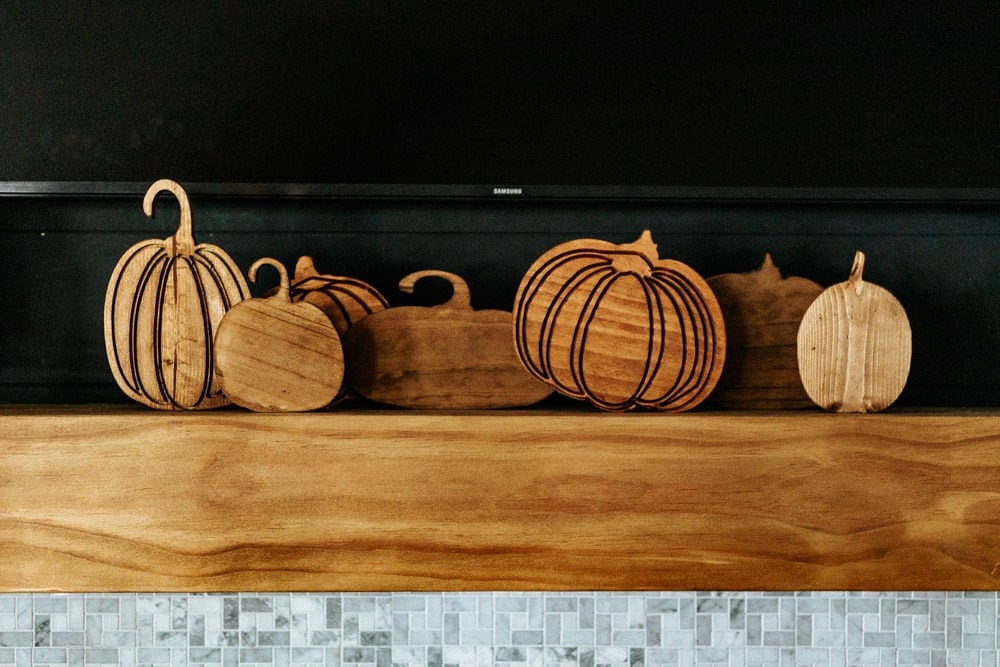
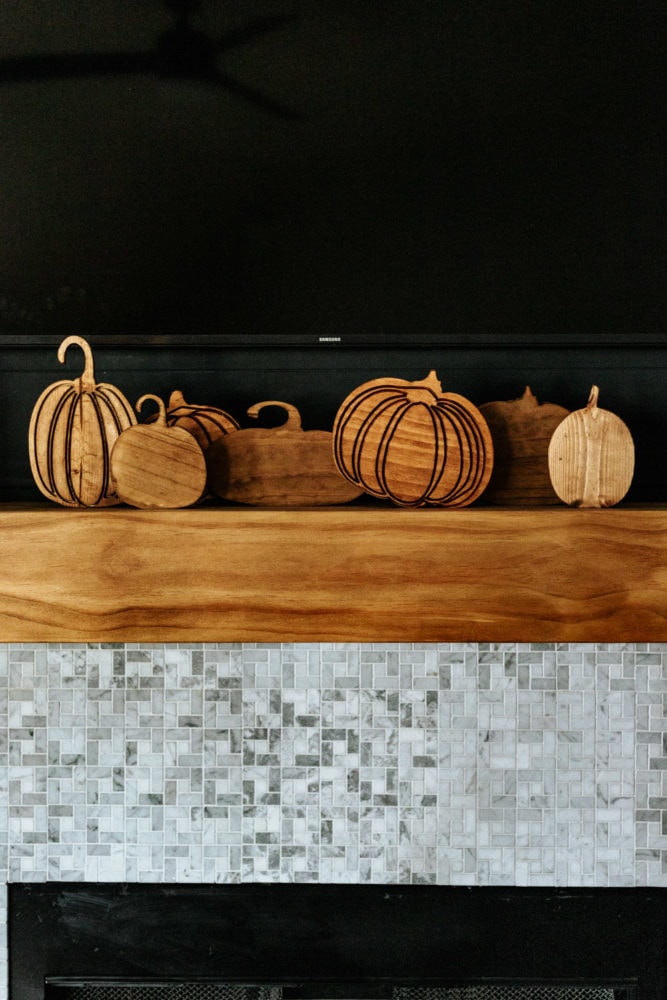
DIY Carved Wood Pumpkins
I had the itch to create something, so I decided to whip up these adorable DIY carved wood pumpkins using our Inventables X-Carve. See the full details of how I did it here!
This post is sponsored by Inventables.
One of the hardest things about moving this time of year is that it means I don’t really get to do all of the typical fall creating that I like to do. This is the time of year when I feel most creative and when I really want to decorate our home, make it as cozy as possible, and change a few things. But, it’s just not really in the cards this year.
Because, as I’m sure you know, prepping for a move isn’t really super compatible with making cute fall crafts.
I hadn’t planned on decorating our home for fall at all, but Jackson begged and begged because he also is obsessed with this time of year. We added a few small things around the house a couple of weeks back, but he would have been much happier if we had done even more. I felt a little bad about crushing his fall dreams, so this morning I decided to surprise him when he came home from school with some cute new pumpkin decor.
I’ll admit that my motivation for this project was two-fold – I wanted to make Jackson smile with something fun and fall-ish, but I also really wanted some more practice with our X-Carve. If you’re new around here, we got an Inventables X-Carve 3D Carver this year and it’s incredibly cool but also incredibly intimidating. I’ve tried it out a few times with Corey’s help (we made these adorable wooden baby teethers and these bread boards that I’m still obsessed with), but this was my first opportunity to use the machine all by myself while he was at work.
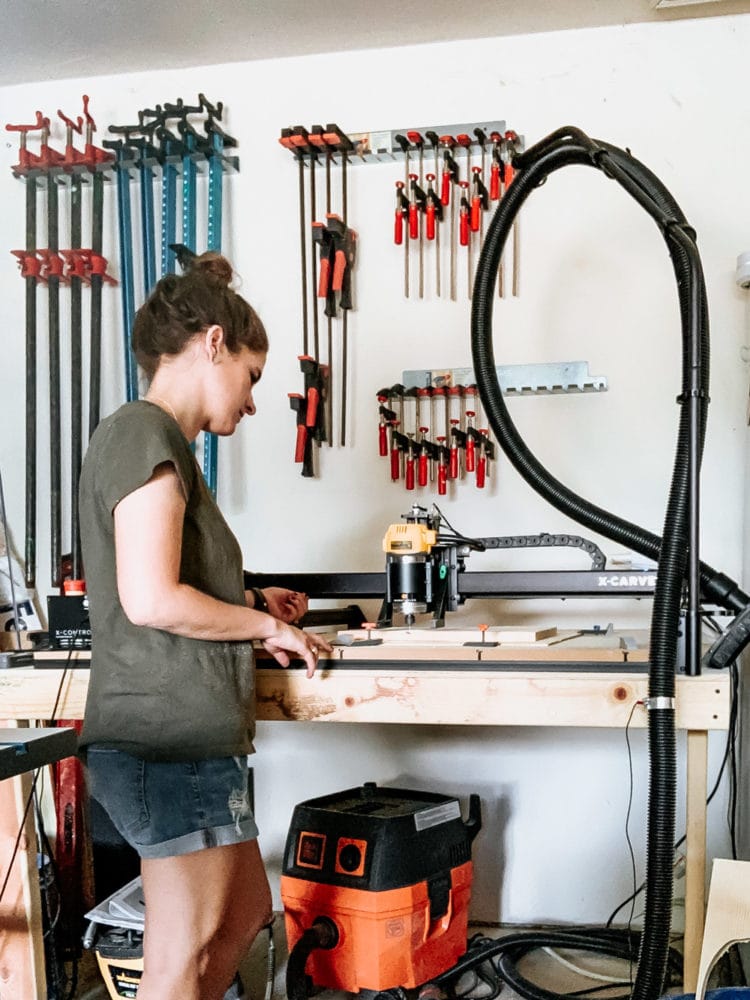

I’ll be the first to admit that I was very nervous to try this out, but I’m so glad I did! New tools take time to learn, especially ones as complex as the X-Carve, and every time I use it I get a little bit better at it.
Of course, this is a project that you could do with a jigsaw or a scroll saw, but this is by far the easiest way to go about it. I simply designed the pumpkins using some free vector designs that I found online and modified so that they could easily be cut out. I still had to make some adjustments while I was cutting, but I was mostly able to figure it out on the fly!
Honestly, I hope that this entire project can serve as a reminder to all of us that we can do scary things. Anytime I’m faced with a project that I’m not confident will work out, I’m tempted to ask Corey to help me with it or back out completely – but I never regret pushing through the fear and trying it because I always learn something new! I gained a little more confidence with our X-Carve with this project, and I want to keep getting out there and practicing with it (by myself!) so that I can get even better.

Here are some more details about the project:
DIY Carved Wood pumpkins
Materials I used:
- 1X12 Pine board
- Pumpkins SVG file
- 1/8″ X-Carve Bit (for the straight cuts)
1/8″ 60-degree V-Bit (for the carving) - Random orbital sander
- Stain, in varying shades (I used Dark Walnut and Provincial, but they ended up looking mostly the same)
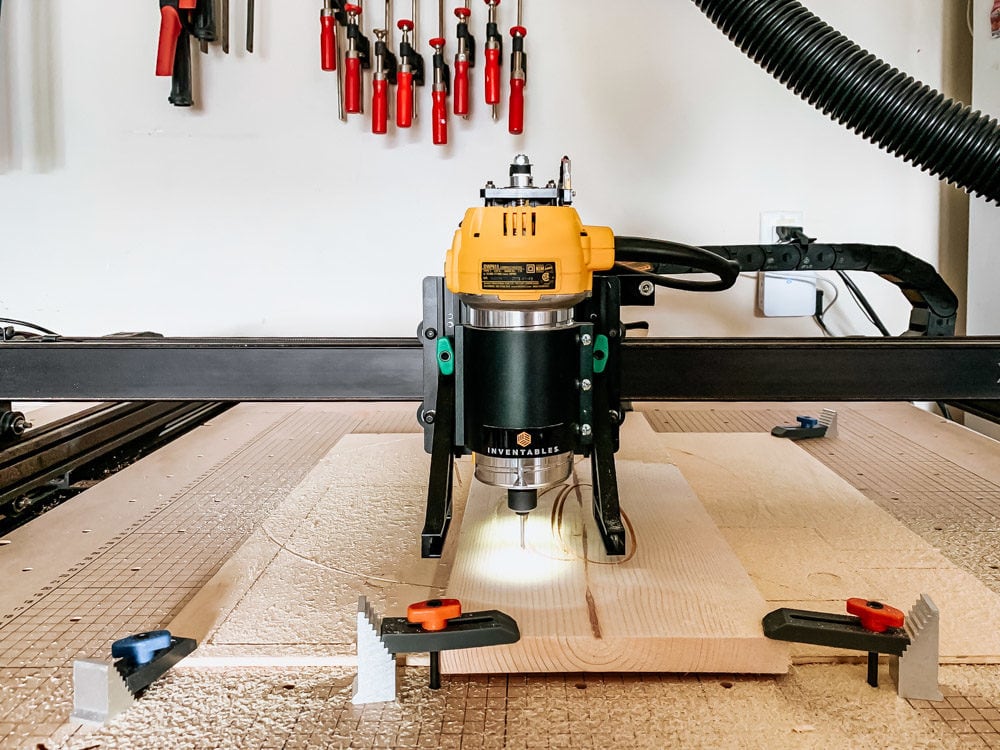
All there really is to this project is securing the wood to the machine and clicking “start”! You can check out this post for a more thorough tutorial of how exactly the X-Carve works, but honestly, it does about 95% of the work for you!
After I cut out each pumpkin, I gave them a light sanding with my random orbital sander, then I stained them. If I planned on leaving them on the fireplace, I probably would have used different colors of stain and maybe even some paint, but since I think they’ll likely end up in Jackson’s room, I stuck to my favorite stain shades.
And really, that’s it!
Jackson was thrilled with the surprise, and I can’t wait to make something else for him with the X-Carve. I’m thinking he’d love a sign for his room at the new house! Or maybe a wooden Christmas tree for his room? I could even make some ornaments that he can attach and re-attach! Ohhh, now I’m getting excited.
If you want more information on the X-Carve and all of the incredible things it can do, click here to check out their website and learn all about it. You can also click here to see their (free) design program, or head over to their project page to get an idea of all of the different types of things you can create. I honestly think that the only thing limiting me with this machine is my own imagination – it can do almost anything!
Are you able to share these on inventables? The link isn’t currently working and these are adorable.
Try this link! https://easel.inventables.com/projects/9U_NnhgnuBw0LO1OYTitXA