
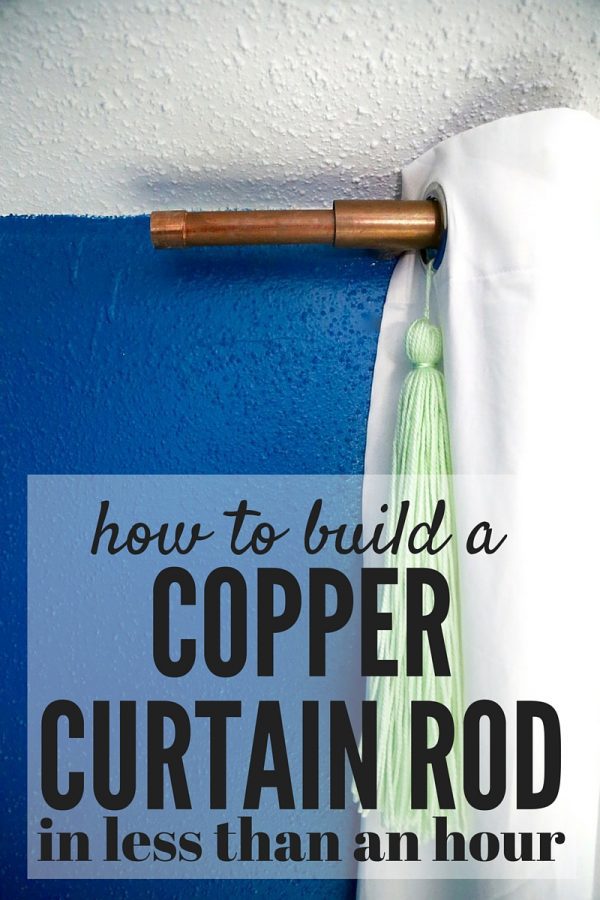
Our DIY Copper Curtain Rod
Learn how to make a gorgeous DIY copper curtain rod!
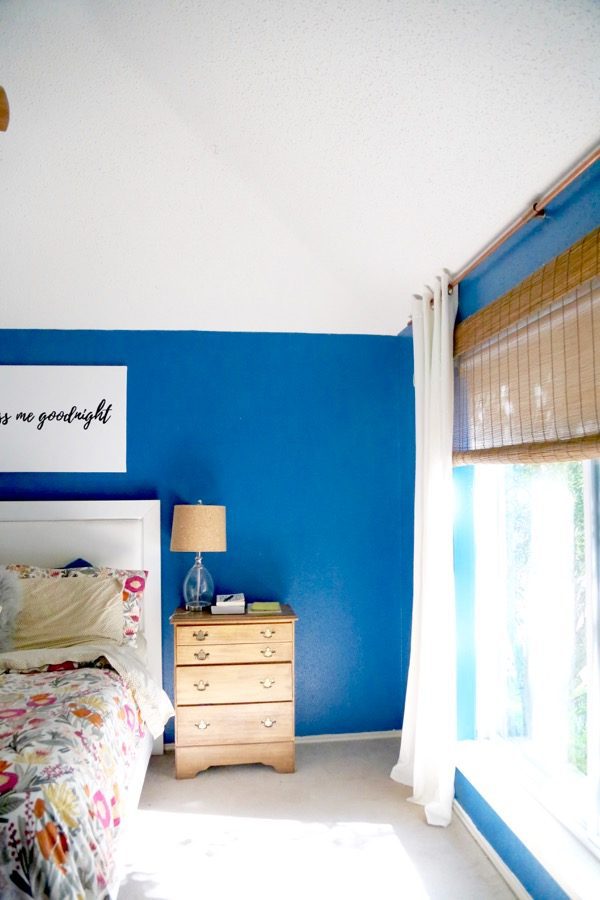
If you’ve been reading here for any length of time, you know that I’m a big fan of finding my own way to do things for our home. If there’s a way that I can DIY something instead of purchasing it, that’s generally what I’m going to do. So, when Corey and I started to focus a little more on making our bedroom a beautiful and comfortable place to be, I knew we’d be tackling as many of the projects as we could ourselves – including a DIY copper curtain rod. One of the things we’ve been talking about the longest for that room is the curtains – we used to have curtains in there, but we stole them for Jackson’s room and never got around to replacing them.
We’ve tried the whole DIY curtain rod thing before, and while we were very pleased with our efforts at the time it’s definitely not my style anymore. When we started talking about putting up curtains in our room, we knew we wanted to give the project another go. I’ve been dreaming of something more fun than a plain silver curtain rod for a while now – we originally discussed trying acrylic, but it’s not super easy to get your hands on.
So, we did what we normally do in these situations – we headed to the hardware store and wandered around until inspiration struck. When we saw the copper pipes, we knew we had our answer.
This post contains affiliate links. Click here to read my full disclosure policy.
Do you love it? Because I love it.
How to Make a DIY Copper Curtain Rod
Materials Needed:
– One 3/4″ copper pipe
– Pipe cutter
– Three 1″ copper tees
– Two 3/4″ copper tube caps
– A 1-1/8″ wooden dowel
– Screws
– 3 copper screws
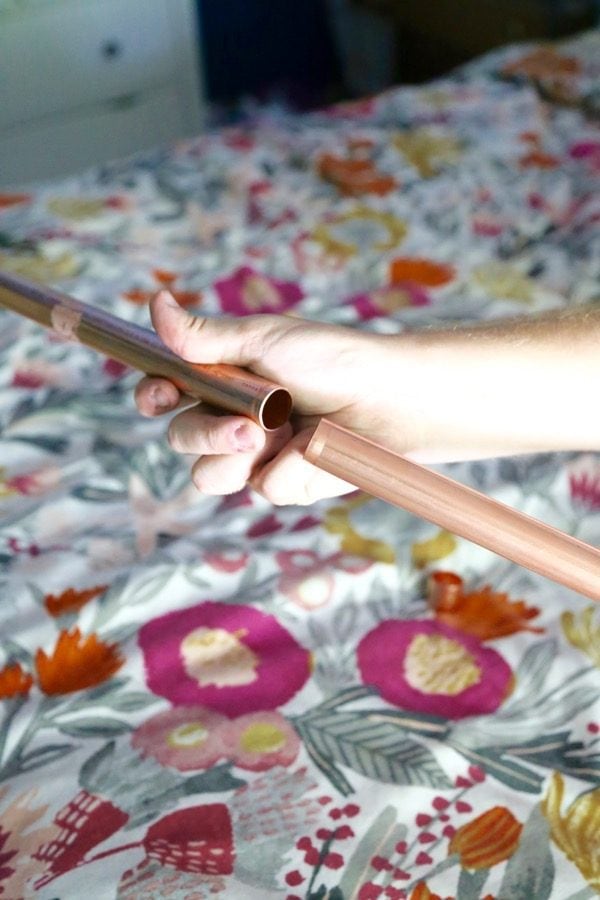
Step 1: Cut the Copper Pipe
First up, we figured out how long we wanted our curtain rod to be, and cut the pipe down. We bought a 10-foot pipe and cut it down to 9 feet using the pipe cutter. It’s incredibly simple to use – just fit it around the pipe and tighten it, then start twisting. Continue tightening as you go, and after a minute or so it will come right apart.
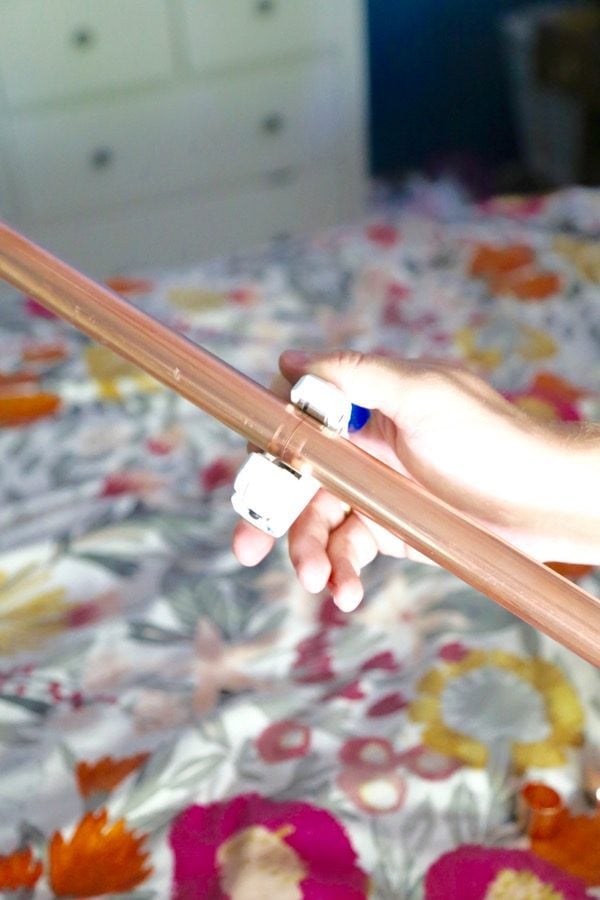
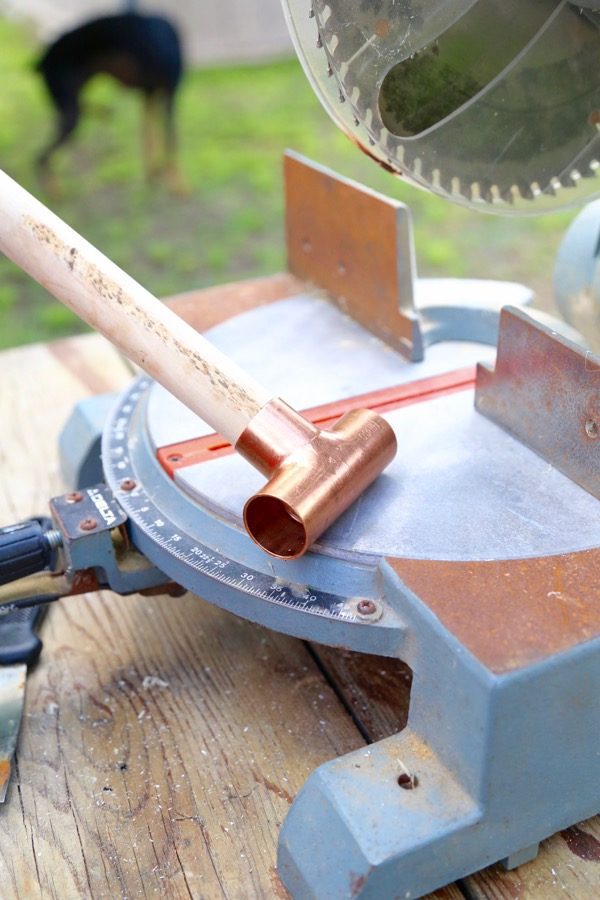
Step 2: Create Mount
Then, we took the wooden dowel and cut it down to fit inside a section of the tee. To measure, we pushed the pipe into the tee and marked at the top of the tee (pictured below). Then, we just cut it down to where the mark is. This will be used to attach the tee to the wall for mounting the curtain rod (it’ll all make sense in a minute, just stick with me!).
While we were at it, we drilled a pilot hole in the dowel (for mounting it to the wall) as well as in the tee (to add a screw for keeping the curtain rod in place). We repeated this process three times to create three mounting points for the curtain rod.
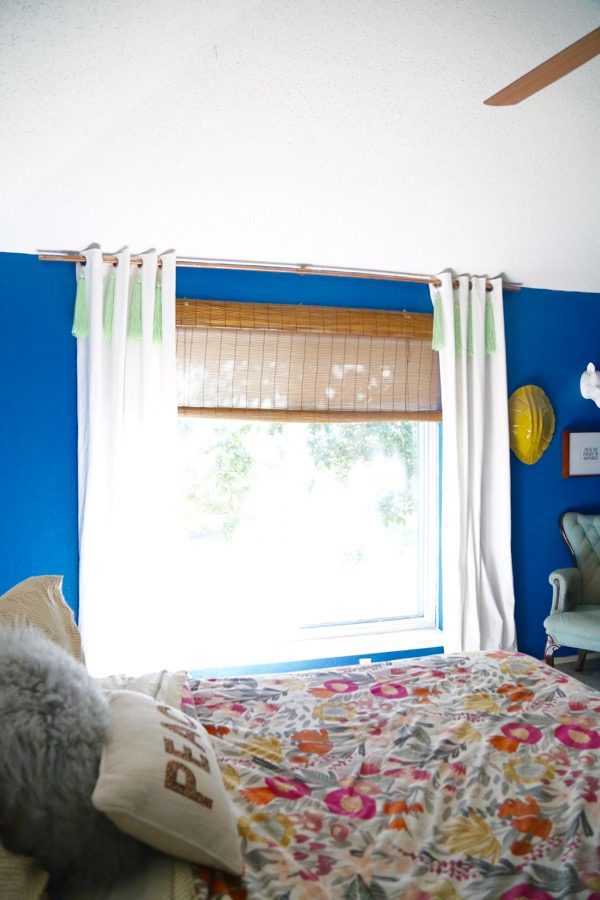
Step 3: Hang the Curtain Rod
To mount the curtain rod, we drilled one of our pre-cut dowel pieces at either end of the window, as well as one in the middle. We like to hang our curtains high and wide, so we went a couple of inches down from the ceiling line and allowed plenty of room on both ends too. Then, we pushed the tee onto the dowel and strung the pipe through the tees. Once it was all done, we just placed the cap on the end and we were finished!
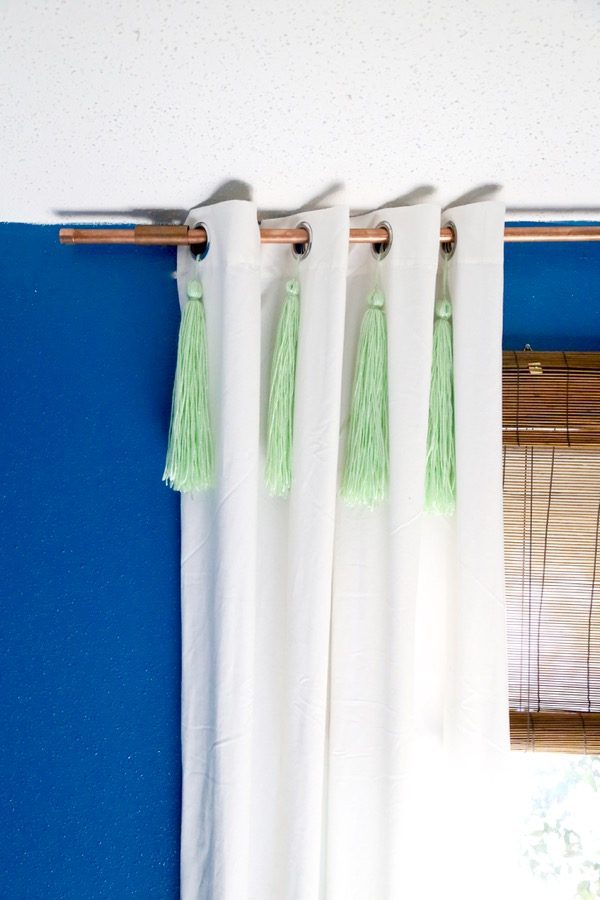
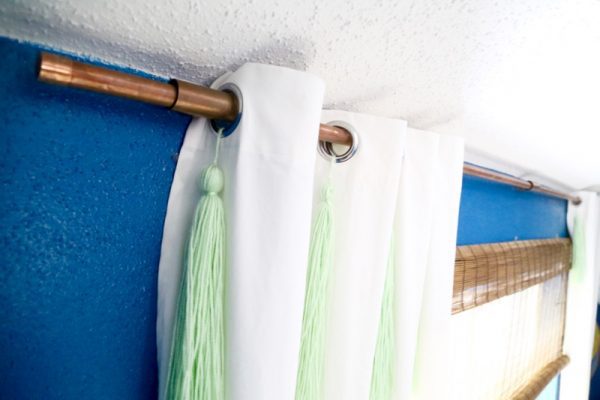
Once we got it all hung up, we took some copper screws and added them to the tee where we drilled the pilot holes earlier – we didn’t screw them in all the way, just enough to help hold everything in place should our toddler decide to swing from the curtains (as toddlers are apt to do).

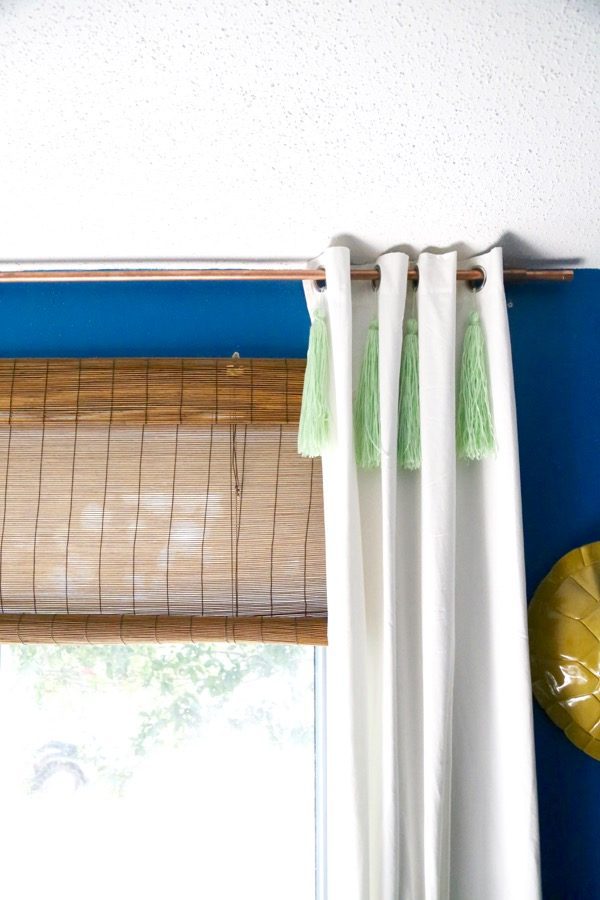
This project was beyond simple. The idea of making your own curtain rods can sound so overwhelming, but I promise you it is about a zillion times easier than you would ever expect. I love that we were able to find the right parts to make it look less industrial than our first attempt was, and I don’t think it looks homemade at all.
O.k Now I get it about the dowel. I too was not seeing the whole picture. Great idea. I am going to save this one. Thanks.
Glad it makes sense! 🙂
Such a great idea! Our home actually has copper accents on the exterior (window awnings, etc.) and I’ve been wanting to bring in some copper to the interior as well. This is a fun option!
Thanks! I’m all about the copper accents lately – so pretty!